
Page 545 - ProShow Producer 9 Final Manual
P. 545
544 17. Keyframing
Now that the layer is setup and adjusted, let's add the first caption.
4. In the Captions pane, click the Add (+) button to create a
new caption.
5. Click the Caption Settings tab. In the Caption Text area,
begin typing some text.
One of the keys to this effect is choosing the right font. You'll want to select
a font that looks like handwriting. Windows has several script fonts
9
installed that will work nicely including Segoe Script.
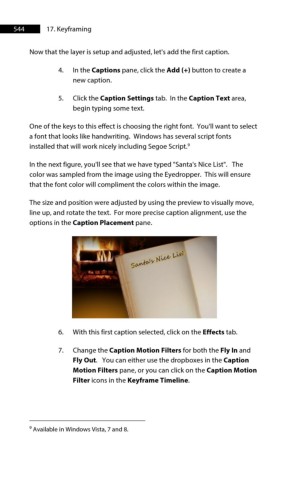
In the next figure, you'll see that we have typed "Santa's Nice List". The
color was sampled from the image using the Eyedropper. This will ensure
that the font color will compliment the colors within the image.
The size and position were adjusted by using the preview to visually move,
line up, and rotate the text. For more precise caption alignment, use the
options in the Caption Placement pane.
6. With this first caption selected, click on the Effects tab.
7. Change the Caption Motion Filters for both the Fly In and
Fly Out. You can either use the dropboxes in the Caption
Motion Filters pane, or you can click on the Caption Motion
Filter icons in the Keyframe Timeline.
9 Available in Windows Vista, 7 and 8.