
Page 403 - ProShow Producer Manual
P. 403
403
This makes the layer that will become our mask. We picked red as the color
because for the mask type we’re about to use, color makes no difference.
This is going to act as our “tape” that will block out an area for the white to
show up. Since the “tape” isn’t seen in our show, the color doesn’t matter.
7. Because we know this will be our mask, to stay organized, go
ahead and rename this layer. In the Selected Layer pane, click on
the Rename link and change the name of this layer to "Masking
Layer"
Remember our goal is to make a circle, and right now the mask is a square.
To get the layer into the correct shape, we’re going to use the vignette
feature creatively.
8. Click on the Adjustments tab.
9. Make sure Layer 1, your red layer, is selected
and click on the Vignette button located in
the Editing Tools pane.
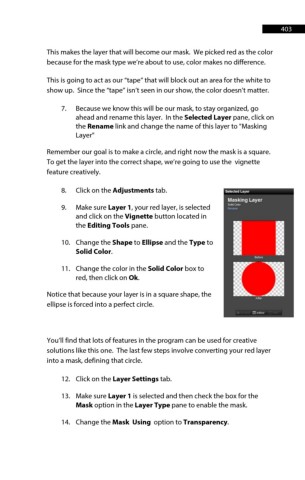
10. Change the Shape to Ellipse and the Type to
Solid Color.
11. Change the color in the Solid Color box to
red, then click on Ok.
Notice that because your layer is in a square shape, the
ellipse is forced into a perfect circle.
You’ll find that lots of features in the program can be used for creative
solutions like this one. The last few steps involve converting your red layer
into a mask, defining that circle.
12. Click on the Layer Settings tab.
13. Make sure Layer 1 is selected and then check the box for the
Mask option in the Layer Type pane to enable the mask.
14. Change the Mask Using option to Transparency.