
Page 411 - ProShow Producer Manual
P. 411
411
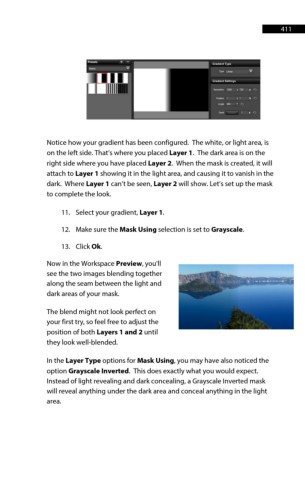
Notice how your gradient has been configured. The white, or light area, is
on the left side. That’s where you placed Layer 1. The dark area is on the
right side where you have placed Layer 2. When the mask is created, it will
attach to Layer 1 showing it in the light area, and causing it to vanish in the
dark. Where Layer 1 can’t be seen, Layer 2 will show. Let’s set up the mask
to complete the look.
11. Select your gradient, Layer 1.
12. Make sure the Mask Using selection is set to Grayscale.
13. Click Ok.
Now in the Workspace Preview, you'll
see the two images blending together
along the seam between the light and
dark areas of your mask.
The blend might not look perfect on
your first try, so feel free to adjust the
position of both Layers 1 and 2 until
they look well-blended.
In the Layer Type options for Mask Using, you may have also noticed the
option Grayscale Inverted. This does exactly what you would expect.
Instead of light revealing and dark concealing, a Grayscale Inverted mask
will reveal anything under the dark area and conceal anything in the light
area.