
Page 358 - ProShow Producer 9 Final Manual
P. 358
357 357
Using Volume Control Points
As you learned earlier in this chapter, when you select a track for editing, at
the beginning and end of track, you'll find yellow Volume Control Points at
the top and bottom of the control border.
By default, these are anchor points that
represent the master volume for the track -
which is generally set to 100%.
Using the Timeline View, you can insert
additional Volume Control Points anywhere
you'd like within a track.
This allows you to create custom changes in
volume all throughout the playback of a
track.
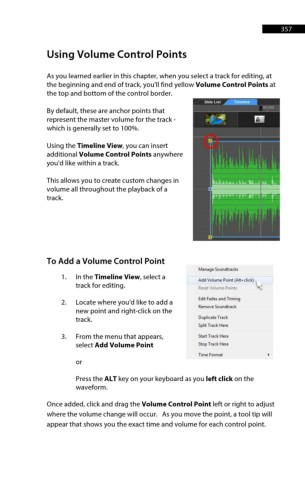
To Add a Volume Control Point
Manage Soundtraclcs
1. In the Timeline View, select a Add Volume Point (Alt+click)
track for editing. Reset Volume Points
2. Locate where you'd like to add a Edit Fades and Timing
Remove Soundtrack
new point and right-click on the
track. Duplicate Track
Split Track Here
3. From the menu that appears, Start Track Here
select Add Volume Point Stop Track Here
Time Format
or
Press the ALT key on your keyboard as you left click on the
waveform.
Once added, click and drag the Volume Control Point left or right to adjust
where the volume change will occur. As you move the point, a tool tip will
appear that shows you the exact time and volume for each control point.