
Page 179 - ProShow Producer Manual
P. 179
179
Your selection region can be changed in two ways: you can change where
the selection is placed on the image, and you can change the size.
To change the size and shape of your selection region, click on any of the
anchor points that appear in each of the corners and on all four sides. These
anchor points can be dragged to adjust the selection region.
Changing the position of the selection region is just a matter of click and
dragging the whole region to a spot where you want it to be.
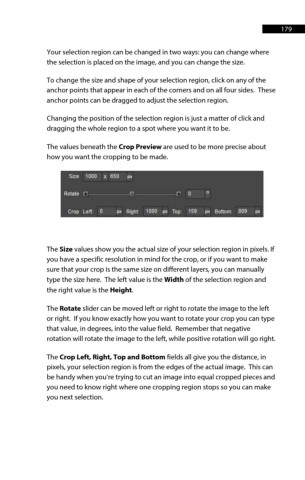
The values beneath the Crop Preview are used to be more precise about
how you want the cropping to be made.
The Size values show you the actual size of your selection region in pixels. If
you have a specific resolution in mind for the crop, or if you want to make
sure that your crop is the same size on different layers, you can manually
type the size here. The left value is the Width of the selection region and
the right value is the Height.
The Rotate slider can be moved left or right to rotate the image to the left
or right. If you know exactly how you want to rotate your crop you can type
that value, in degrees, into the value field. Remember that negative
rotation will rotate the image to the left, while positive rotation will go right.
The Crop Left, Right, Top and Bottom fields all give you the distance, in
pixels, your selection region is from the edges of the actual image. This can
be handy when you’re trying to cut an image into equal cropped pieces and
you need to know right where one cropping region stops so you can make
you next selection.