
Page 586 - ProShow Producer 9 Final Manual
P. 586
585 585
Why Copy Modifiers?
Just like advanced keyframe effects benefit from copying settings, modifier
effects can be created much faster when you copy settings as often as
possible. Consider the “Dog Shake” example from above. If you want your
layer to shake more than once on a slide, it’s best to copy that modifier to
another keyframe. This will save you time compared to manually recreating
the modifier for a later keyframe. It will also keep your look consistent, so
you have the same basic shake in each keyframe.
If your shake happens on keyframe 2, and you want to see it again at the
end, just copy it. In this case, a later keyframe might be keyframe 6. Choose
the modifier for keyframe 2; use the copy dialog to copy that same thing to
keyframe 6. Voila – you have the same shake on another keyframe without
any manual work at all.
Note: if you are creating effects that call for you to copy keyframes,
remember that any modified keyframes will copy with their modifiers intact.
So, if you copy a keyframe, that keyframe will include any modifiers applied
to it.
There’s one final advanced feature to modifiers that you can use to refine
and enhance your functions. This is the Interactive Fade Line
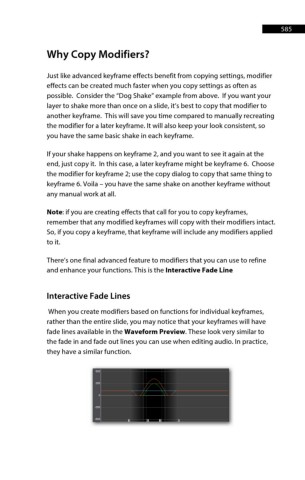
Interactive Fade Lines
When you create modifiers based on functions for individual keyframes,
rather than the entire slide, you may notice that your keyframes will have
fade lines available in the Waveform Preview. These look very similar to
the fade in and fade out lines you can use when editing audio. In practice,
they have a similar function.