
Page 224 - ProShow Producer 9 Final Manual
P. 224
223 223
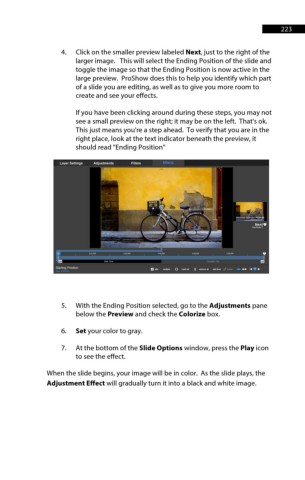
4. Click on the smaller preview labeled Next, just to the right of the
larger image. This will select the Ending Position of the slide and
toggle the image so that the Ending Position is now active in the
large preview. ProShow does this to help you identify which part
of a slide you are editing, as well as to give you more room to
create and see your effects.
If you have been clicking around during these steps, you may not
see a small preview on the right; it may be on the left. That's ok.
This just means you're a step ahead. To verify that you are in the
right place, look at the text indicator beneath the preview, it
should read "Ending Position"
5. With the Ending Position selected, go to the Adjustments pane
below the Preview and check the Colorize box.
6. Set your color to gray.
7. At the bottom of the Slide Options window, press the Play icon
to see the effect.
When the slide begins, your image will be in color. As the slide plays, the
Adjustment Effect will gradually turn it into a black and white image.